4 Hour film challenge.
Unusual perspective.
Plan.
When starting to plan our 4 hour film challenge we started to think of things from different viewpoints, which is where we came up with the idea that there may be a prisoner trapped inside or a ghost who cannot leave, from this we decided to have all shots looking out of a window into a reality of which the person cannot experience. We also decided to split our time equally and use 2 hours filming and two hours editing so that we could edit effectively and not have it look rushed or unfinished. We also needed enough time to edit as parts of it got complex therefore an effective use of time was needed in order to get the fast paced editing in the end.
When making our shots we decided to use a range of high key and low key lighting to add contrast to the film as well as old fashioned music that was slightly poor quality to add a nostalgic feel to it as well as emphasising the poor quality of life that the 'person' may be experiencing. We chose to use a contrast in order to get the audience to question if the entrapment that the 'person' is a bad thing or a good thing emphasised by the use of low-key and high key lighting.
Final edit.
Evaluation.
One thing that could have further enforced the idea that the 'person' was trapped was by using a larger range of shots instead of just looking out of a window, for instance we could have used a close up of a hand resting on the window or a fist hitting the window trying to get out and being unsuccessful. As well as this the very end shot could have had another silhouette standing at the window to even more emphasise the fact that the 'person' is trapped and unable to escape their prison.
Another thing that could have improved the film was by using diegetic sound instead of only non diegetic sound which was only nostalgic music. We could have used knocking on the windows, footsteps or even whispering of what the 'person' is thinking as in monologue to what is happening, what they are thinking and what they are feeling. By using this we could have again emphasised the fact that they are trapped as the audience would get to understand more about the character rather than just what they are feeling.
However a strength of our film was the fact we used a range of lighting involving high key and low key lighting adding different moods to the shots for the audience to decode and try and gain a sense of what the 'person' is feeling. This was also a strength as we got to show our range of skills involving in lighting and how we can use it to create a different feel to each shot.
Another strength of our film is that we were able to demonstrate complex editing skills and even though we encountered technical difficulties like having to rely on the warp stabiliser due to a broken tripod and this not always working we were still able to finish the edit to look effective. We were also able to cut up different shots and even had split second shots to try and give the film a deeper meaning and add an almost 'creepy' feel to it by making audiences question what is happening.
Overall I think that our film is effective by using a range of lighting, camera and editing techniques to get across the idea of the 'person' being entrapped to only look out to the world outside. This also meant that we could use and show a range of skills. However with adding more diegetic audio to the film and a wider range of shots involving props and the movements of the 'person' within the mise-en-scene we could have get the idea of entrapment even more identifiable by the audience watching instead of trying to actively decode the meaning.
Labels
Thursday, September 27, 2018
Friday, September 21, 2018
Lighting setups
Evidence of different lighting setups
Studio Lights.
Rembrandt.
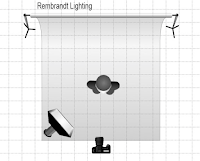
The Rembrandt lighting has been inspired by a Dutch painter born in 1606. His style of painting often left a triangle of lighting under the subjects eye. This type of lighting has been adapted as Hollywood grew as it was often used on Hollywood actors and actresses as it is a good technique due to the fact it is "simple, effective lighting setup that is flattering to a wide variety of subjects and is easy to master quickly" . When creating this on my own I used the lighting set up demonstrated below and has a slight triangle under the subjects eye however it didn't turn out as prominent as originally expected so if I was to do this again I would make sure that the light was a more of a 45 degree angle and possibly use a reflector in order to get the light correctly under the subjects eye.
Butterfly Lighting.
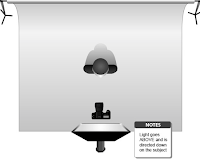
Butterfly lighting is a lighting technique where it adds shadows underneath the subjects face most notably the shadow under the nose which often resembles a butterfly. This shadow is created by using a key light directly in front the subjects face and slightly above pointing down in order to create the shadow effect. Similarly to Rembrandt lighting this style was also often used on Hollywood actors and Actresses in particularly in the Paramount Movie Studios of old Hollywood. I feel that my first try in creating this style of lighting is effective as it clearly defines the shadows under the subjects facial features with emphasis under the subjects nose. However if I was to recreate this shot I would try and make sure that the lighting wasn't as low key as it was and try to make it more high key.
Edge Lighting.
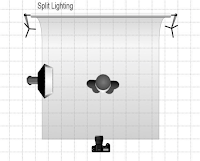
Split lighting is created by using one light source which is placed 90 degrees to the subjects face in order to illuminate one side of the face and cast a shadow on the other side often in complete darkness. This style of lighting is 'used a lot in film noir cinematography' as it can be used to suggest the characters battle of moral ambiguity and show the binary opposition of good vs evil within the character as they may be doing bad things for a good reason. I feel that my demonstration of edge lighting is effective as it add dramatic effect while showing a clear divide between light and shadow on the subjects face, however if I was to recreate this I would attempt to find edge lighting in a natural set up to experiment with all the ways this style of lighting can be created.
Low key lighting.
Low key lighting is often a big part of the technical conventions in genres like Horror or Film Noir this is because it often gives connotations of mystery or fear or the unknown. Low key lighting occurs when there is only 1 light source and casts shadows withing the mise-en-scene. When experimenting with low key lighting I found a dark corridor and used a torch propped up on a chair in order to cast a shadow. I got the subject to just walk past the camera and in the low key lighting they almost looked like a silhouette with a shadow casted on the wall as they walked past. I feel that this experiment with the low key lighting is effective as you can see the detail in the shot but the light is dark enough to not have everything in the scene be illuminated. However when looking at the health and saftey of low key lighting I would have to make sure that there is nothing blocking the subjects path that would cause the to trip and make sure that they can see well enough to know where they are walking
High key Lighting.
High key lighting is used to illuminate the scene evenly and reduces the amount of shadows produced in order to give the connotations of feeling positive and gives the opposite effect of low key lighting. High key lighting means that multiple subjects in the frame are all evenly lighted insreda of falling victium to shaodows. When experimenting with high key lighting I chose to shot outside when it was fairly sunny so that the shot wouldbe fully illuminated. One problem with this is that I didnt use any other light source and primarily relied on ambient lighting to light up the shot meaning that some shadows could be caused. However when looking at my shot minimal shadows are used and the small ones created work effectively at giving the shot a greater sense of verisimilitude.
Experimental lighting 1.
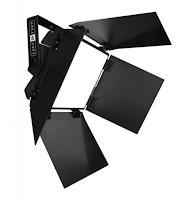
When first experimenting with lighting I used a portable area 48 Led light to help create the dramatic effect of the shadow behind the subject in a low key light while also illuminating the subjects face. I placed the light to the right of the subjects face around 45 degrees in order to get the effect that was created. I feel like my first experiment with light was effective as it illuminated the features of the subjects face without over lighting the background to keep it dark and dramatic. When looking at health and safety I had to make sure that the light didn't get overheated so that is didn't trip out and stop working, I also had to make sure that the subject didn't get overheated
Experimental lighting 2.
When creating my second experimental lighting I used the same area 48 LED light by increasing the intensity of the light to add more of a high key lighting effect, while doing this I placed a hand near the bottom of the light to cast a slight shadow on the bottom half of the subjects face in order to help highlight the subjects eyes. In terms of health and safety I made sure the the light wasn't too hot for someone to hold their hand in front in order to make sure that they don't get burned, and make sure that the light doesn't overheat and trip out. I would also make sure that the subject is comfortable and isn't overheated.
Studio Lights.
Rembrandt.
The Rembrandt lighting has been inspired by a Dutch painter born in 1606. His style of painting often left a triangle of lighting under the subjects eye. This type of lighting has been adapted as Hollywood grew as it was often used on Hollywood actors and actresses as it is a good technique due to the fact it is "simple, effective lighting setup that is flattering to a wide variety of subjects and is easy to master quickly" . When creating this on my own I used the lighting set up demonstrated below and has a slight triangle under the subjects eye however it didn't turn out as prominent as originally expected so if I was to do this again I would make sure that the light was a more of a 45 degree angle and possibly use a reflector in order to get the light correctly under the subjects eye.

Butterfly Lighting.
Butterfly lighting is a lighting technique where it adds shadows underneath the subjects face most notably the shadow under the nose which often resembles a butterfly. This shadow is created by using a key light directly in front the subjects face and slightly above pointing down in order to create the shadow effect. Similarly to Rembrandt lighting this style was also often used on Hollywood actors and Actresses in particularly in the Paramount Movie Studios of old Hollywood. I feel that my first try in creating this style of lighting is effective as it clearly defines the shadows under the subjects facial features with emphasis under the subjects nose. However if I was to recreate this shot I would try and make sure that the lighting wasn't as low key as it was and try to make it more high key.
Edge Lighting.
Split lighting is created by using one light source which is placed 90 degrees to the subjects face in order to illuminate one side of the face and cast a shadow on the other side often in complete darkness. This style of lighting is 'used a lot in film noir cinematography' as it can be used to suggest the characters battle of moral ambiguity and show the binary opposition of good vs evil within the character as they may be doing bad things for a good reason. I feel that my demonstration of edge lighting is effective as it add dramatic effect while showing a clear divide between light and shadow on the subjects face, however if I was to recreate this I would attempt to find edge lighting in a natural set up to experiment with all the ways this style of lighting can be created.

Low key lighting.
Low key lighting is often a big part of the technical conventions in genres like Horror or Film Noir this is because it often gives connotations of mystery or fear or the unknown. Low key lighting occurs when there is only 1 light source and casts shadows withing the mise-en-scene. When experimenting with low key lighting I found a dark corridor and used a torch propped up on a chair in order to cast a shadow. I got the subject to just walk past the camera and in the low key lighting they almost looked like a silhouette with a shadow casted on the wall as they walked past. I feel that this experiment with the low key lighting is effective as you can see the detail in the shot but the light is dark enough to not have everything in the scene be illuminated. However when looking at the health and saftey of low key lighting I would have to make sure that there is nothing blocking the subjects path that would cause the to trip and make sure that they can see well enough to know where they are walking
High key Lighting.
High key lighting is used to illuminate the scene evenly and reduces the amount of shadows produced in order to give the connotations of feeling positive and gives the opposite effect of low key lighting. High key lighting means that multiple subjects in the frame are all evenly lighted insreda of falling victium to shaodows. When experimenting with high key lighting I chose to shot outside when it was fairly sunny so that the shot wouldbe fully illuminated. One problem with this is that I didnt use any other light source and primarily relied on ambient lighting to light up the shot meaning that some shadows could be caused. However when looking at my shot minimal shadows are used and the small ones created work effectively at giving the shot a greater sense of verisimilitude.
Experimental lighting 1.

When first experimenting with lighting I used a portable area 48 Led light to help create the dramatic effect of the shadow behind the subject in a low key light while also illuminating the subjects face. I placed the light to the right of the subjects face around 45 degrees in order to get the effect that was created. I feel like my first experiment with light was effective as it illuminated the features of the subjects face without over lighting the background to keep it dark and dramatic. When looking at health and safety I had to make sure that the light didn't get overheated so that is didn't trip out and stop working, I also had to make sure that the subject didn't get overheated
Experimental lighting 2.
When creating my second experimental lighting I used the same area 48 LED light by increasing the intensity of the light to add more of a high key lighting effect, while doing this I placed a hand near the bottom of the light to cast a slight shadow on the bottom half of the subjects face in order to help highlight the subjects eyes. In terms of health and safety I made sure the the light wasn't too hot for someone to hold their hand in front in order to make sure that they don't get burned, and make sure that the light doesn't overheat and trip out. I would also make sure that the subject is comfortable and isn't overheated.
- 1) Blian Brown (2012), Lighting basics, Cinematography Theory and Practice Image Making for Cinematographers and Directors, Second edition, The Boulevard, Langford Lane, Kidlington, Oxford OX5 1BG UK, 2012, 106
- 2) The Beat (9th Januray 2018) (online) avaliable from https://www.premiumbeat.com (accessed 30th september 2018) https://www.premiumbeat.com/blog/high-key-vs-low-key-lighting/
Summer task two.
A) How lighting effects camera techniques for moving image.
The lighting used in a scene can be highly effected by the kind of lighting that gets used in the scene and can be particularly effective for moving image by creating a certain mood for an audience to feel as stated in the second edition of Cinematography Theory and Practice by Blain Brown 2012, which says that "lighting can be used to affect the audiences perception of the scene". A way that an audiences mood can be altered is by the type of lighting used for example low key lighting created by little or no fill light and can be used to create a moody feel to the image, this king of lighting would also effect the camera technique used as it may need a higher aperture to make sure the whole image is in focus, this will also allow for and shadows cast to be clearer and sharper, Or it may need a low aperture to make sure the audience is focusing on what is particularly important in the scene rather than making out whats in the background, for example in the film Inception, low key lighting is used so that the audience is focusing on the characters face and used a low aperture in order to blur out the background so the audience is looking at whats most important in the scene.
Inception 2010 Christopher Nolan, Science Fiction/Thriller.
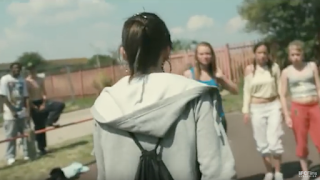
Another way that lighting effects the camera techniques is by altering the exposure that can be seen in an image as "the screen itself should be lit as evenly as possible", for example if using ambient lighting the exposure in the image can vary depending on how the light moves as its effected by natural light meaning that not he whole screen is evenly lit.. When using ambient lighting on a particularly sunny day the aperture and shutter speed may need to be low so that the camera doesn't become overly sensitive to the suns light and make sure that the image doesn't get overly exposed. This lighting extremely effects the camera techniques used in films such as social realism as ambient lighting is the main and in most cases the only way light gets used within the film. In the film Fish Tank the main lighting that gets used is ambient lighting and in the first scene one shot seems to be overexposed due to the changing ambient lighting, and can be seen as the shot appears more white than what it would look like in real life but then gets later corrected to the right exposure .
 Fish Tank 2009, Andrea Arnold, Social realsim, slightly over exposed.
Fish Tank 2009, Andrea Arnold, Social realsim, Correct exposure.
1) Blian Brown (2012), Lighting basics, Cinematography Theory and Practice Image Making for Cinematographers and Directors, Second edition, The Boulevard, Langford Lane, Kidlington, Oxford OX5 1BG UK, 2012, 106
2) Mitch Mitchell (2004), Sel-matting processes, Visual Effects for Film & Television, Linacare House, Jordan Hill, Oxford 0X2 8DP, 2004, 174
B) Lighting equipment and setups that would be used in the following scenarios...
1) A small documentary where portability is paramount
2) 'Talking head' style interview
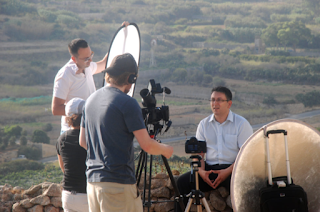
If the interview is taking place outside then only ambient lighting and a diffuser may be used and if its a particularly sunny day in order to block out shadows and diffuse the light. A pro of this is that the audience may feel as though this is a realistic set up without artificial lighting however a con of this is that the diffuser may not completely block the shadows making the interview look less professional.
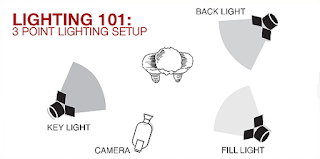
If the interview is taking place inside then a 3 point lighting method might be used, this is created by using a key light to highlight and add dimension to the person being interview, then followed by a fill light which can fill in the shadows that may be cast by the key light and lastly followed by the backlight which can separate the person being interviewed from the background behind them. A pro of this is that all shadows will be cast out and the set up will look much more professional however a con of this is that you may need to be wary of the heat given off from the lights and make sure that the subject doesn't get too hot and overheated.
3) A 'Night time shoot'
For a night time shoot reflectors may be used to reflect the light that is avaliable at night to help light up the scene, they are also good for lighting up a night time shoot by correcting the colour given of from the moon, often blue reflectors are used to do this, they can also be used to make sure the light is focused on the subject to show the audience what is most important within the shot. However reflects may not also be available and may not always be available to light up the scene, in some cases white card may be used.
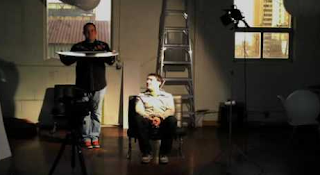
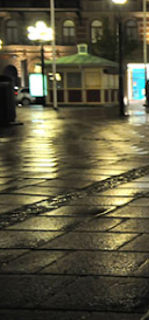
Another way to set up for a nighttime shoot is by using water to light up the scene as it can be used for a good reflector especially in urban areas where is reflects street lights or neon signs, water can create a highly reflective surface and lighten up the scene massively without the use for in some cases rather expensive lights. A pro of this is that water is usually high available and reduces the need to buy bigger lights however a con of this is that water may not be powerful enough to light the whole scene so some other lights may be needed to help solve this issue.
A) How lighting effects camera techniques for moving image.
The lighting used in a scene can be highly effected by the kind of lighting that gets used in the scene and can be particularly effective for moving image by creating a certain mood for an audience to feel as stated in the second edition of Cinematography Theory and Practice by Blain Brown 2012, which says that "lighting can be used to affect the audiences perception of the scene". A way that an audiences mood can be altered is by the type of lighting used for example low key lighting created by little or no fill light and can be used to create a moody feel to the image, this king of lighting would also effect the camera technique used as it may need a higher aperture to make sure the whole image is in focus, this will also allow for and shadows cast to be clearer and sharper, Or it may need a low aperture to make sure the audience is focusing on what is particularly important in the scene rather than making out whats in the background, for example in the film Inception, low key lighting is used so that the audience is focusing on the characters face and used a low aperture in order to blur out the background so the audience is looking at whats most important in the scene.
Inception 2010 Christopher Nolan, Science Fiction/Thriller.
Another way that lighting effects the camera techniques is by altering the exposure that can be seen in an image as "the screen itself should be lit as evenly as possible", for example if using ambient lighting the exposure in the image can vary depending on how the light moves as its effected by natural light meaning that not he whole screen is evenly lit.. When using ambient lighting on a particularly sunny day the aperture and shutter speed may need to be low so that the camera doesn't become overly sensitive to the suns light and make sure that the image doesn't get overly exposed. This lighting extremely effects the camera techniques used in films such as social realism as ambient lighting is the main and in most cases the only way light gets used within the film. In the film Fish Tank the main lighting that gets used is ambient lighting and in the first scene one shot seems to be overexposed due to the changing ambient lighting, and can be seen as the shot appears more white than what it would look like in real life but then gets later corrected to the right exposure .
 Fish Tank 2009, Andrea Arnold, Social realsim, slightly over exposed.
Fish Tank 2009, Andrea Arnold, Social realsim, Correct exposure.
1) Blian Brown (2012), Lighting basics, Cinematography Theory and Practice Image Making for Cinematographers and Directors, Second edition, The Boulevard, Langford Lane, Kidlington, Oxford OX5 1BG UK, 2012, 106
2) Mitch Mitchell (2004), Sel-matting processes, Visual Effects for Film & Television, Linacare House, Jordan Hill, Oxford 0X2 8DP, 2004, 174
B) Lighting equipment and setups that would be used in the following scenarios...
1) A small documentary where portability is paramount
2) 'Talking head' style interview
If the interview is taking place outside then only ambient lighting and a diffuser may be used and if its a particularly sunny day in order to block out shadows and diffuse the light. A pro of this is that the audience may feel as though this is a realistic set up without artificial lighting however a con of this is that the diffuser may not completely block the shadows making the interview look less professional.

If the interview is taking place inside then a 3 point lighting method might be used, this is created by using a key light to highlight and add dimension to the person being interview, then followed by a fill light which can fill in the shadows that may be cast by the key light and lastly followed by the backlight which can separate the person being interviewed from the background behind them. A pro of this is that all shadows will be cast out and the set up will look much more professional however a con of this is that you may need to be wary of the heat given off from the lights and make sure that the subject doesn't get too hot and overheated.

3) A 'Night time shoot'
For a night time shoot reflectors may be used to reflect the light that is avaliable at night to help light up the scene, they are also good for lighting up a night time shoot by correcting the colour given of from the moon, often blue reflectors are used to do this, they can also be used to make sure the light is focused on the subject to show the audience what is most important within the shot. However reflects may not also be available and may not always be available to light up the scene, in some cases white card may be used.


Another way to set up for a nighttime shoot is by using water to light up the scene as it can be used for a good reflector especially in urban areas where is reflects street lights or neon signs, water can create a highly reflective surface and lighten up the scene massively without the use for in some cases rather expensive lights. A pro of this is that water is usually high available and reduces the need to buy bigger lights however a con of this is that water may not be powerful enough to light the whole scene so some other lights may be needed to help solve this issue.
The Development of Editing Technology.
The development of editing technology.
Early editing.
Before digital editing evolved early editing was pretty much none existent when it came to the production of motion pictures and the only way to cut a scene was to start recording at the exact moment the scene started and stop recording the exact moment that the scene ends as it was impossible to cut out any footage that went over the recording time. This means the whoever operated the camera had to be as accurate as possible as mistakes couldn't be taken out, the camera could only record what was in front of the lens, especially due to the fact that the camera also couldn't be moved, due to this most early motion pictures would be one long continuous shot. Eventually early editing and 'cuts' became more common and in order to do this the editor would use a microscope and a razor blade to be as accurate and precise as possible as they were physically cutting the film themselves. This meant that mistakes couldn't be made as some film may be lost. After the film was cut with a razor blade it was then glued to the next part of the motion picture to create more detailed storytelling as film makers felt that it added to a viewers sense of tale rather than one long continuous shot.
However as digital editing evolved and became more advanced so did the way the scenes were cut, Now cutting doesn't have to mean that the camera starts and stop filiming with the scene it can film for a little longer and can get digitally cut on the computer in order to make sure that everything needed in the scene is used and not cut my mistake.
Moviola
The Moviola was a machine that was invented in 1924 and became the standard for motion picture editing up until the 1970s. The reason as to why it was so popular is because it allowed editors to study each single frame that was captured in extreme detail and depth meaning that they were able to see exactly what frame needed to be cut during the editing process without losing any important parts of filming. This style of editing meant that cuts could become more accurate as editors could better decide where the best cut point would be and allowed to start maximising the use of editing to the best of its ability.
Flatbed edit suite

Linear and Non linear editing
Offline and online editing
The digital era
CMX 600
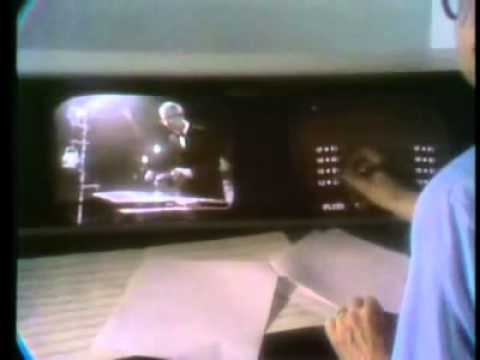
This was the first non linear editing system which used used two screens with a light pen where the right screen would show the preview of the footage, the pen would then be used to edit the footage and make cuts, finally the left screen would show the edited footage. This way of editing was first introduced in 1971.
Edit Droid and Avid 1
These were the frst ways of electronically editing film and did so by projecting the use of graphical display within film and television, eventually many films started using Edit Droid instead of things like the moviola and later switched to Avid 1 creating films like 'Lets Kill All The Lawyers(1992)
Modern editing platforms.
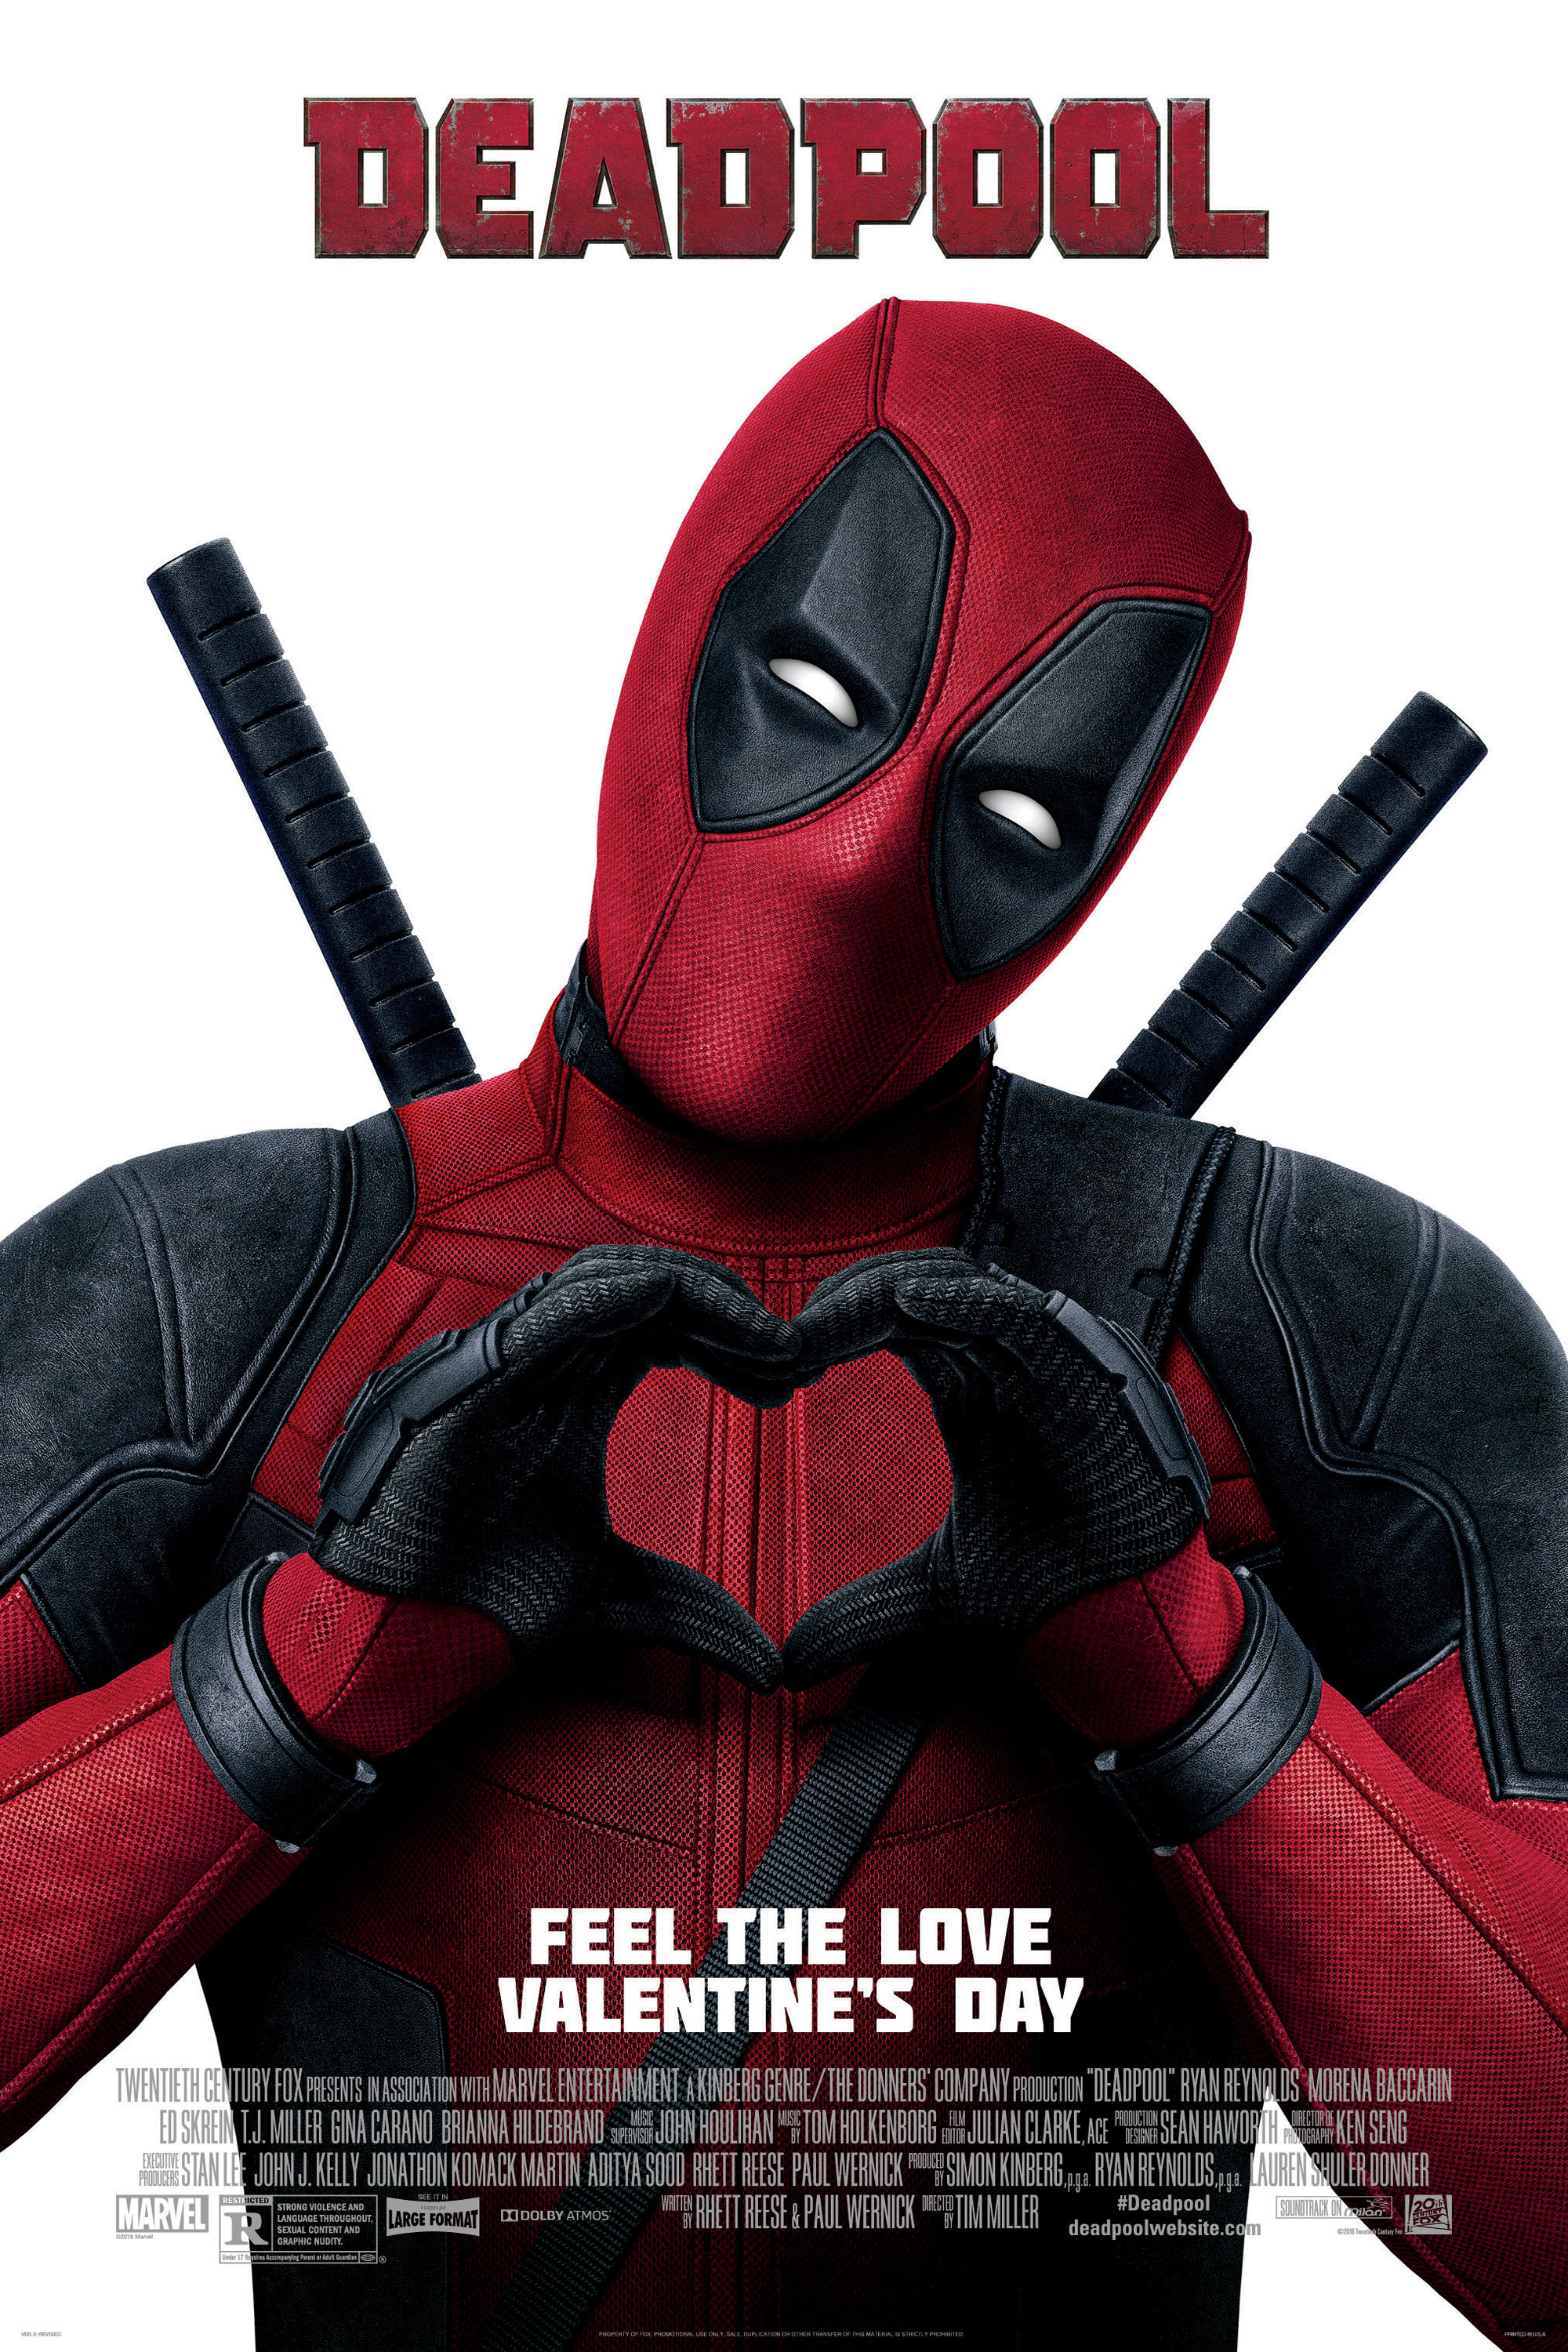
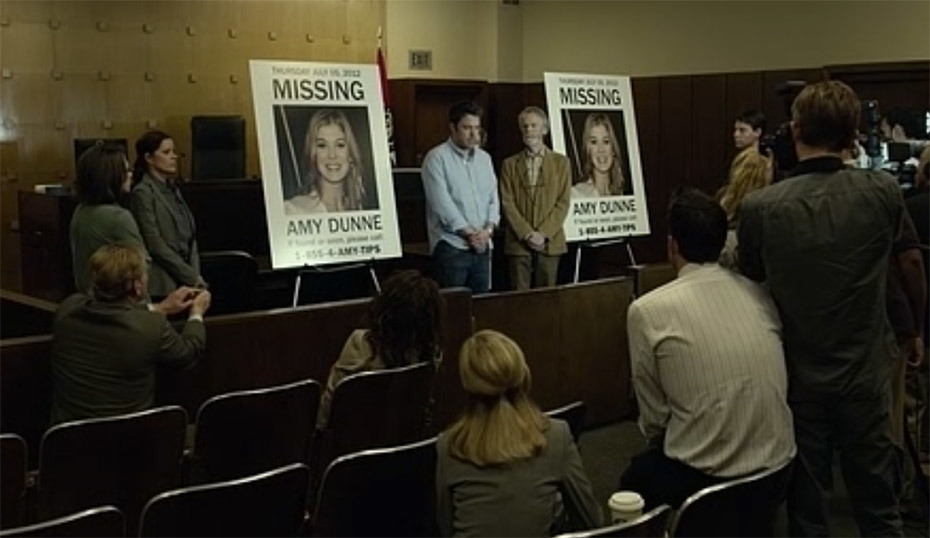
In the postmodern era we have moved of from the times of litteraly cutting film in order to edit and have moved onto digital software such as Premire Pro which can be more widley accessible to the public rather than just editors, these types of systems allows for importing and exporting footage, adding special effects to footage and digitally enhancing them. Modern editing platforms allows for more high and extremley low budget films to made made and easily editing from things like YouTube for channels such as Justin Odisho to big productions such as Gone Girl 2014 and Deadpool 2016.
1)https://www.netribution.co.uk/blogs/guides/2090-from-razor-blade-to-desktop-a-history-of-video-editing
2)https://www.infoplease.com/features/movies-tv-and-music/movies-and-film-fade-brief-history-editing
3)https://emilywheelhousehnccreativemedia.wordpress.com/2016/08/31/development-of-editing-technology/
4) Johnathon Paul, (June 25 2015), avaliable from The Beat.com, What is offline video editing? How does it work….and is it a thing of the past?, What is offline editing?, www.premiumbeat.com, acessesed 19th September 2018
5) https://motionarray.com/blog/how-hollywood-is-turning-to-premiere-pro
Early editing.
Before digital editing evolved early editing was pretty much none existent when it came to the production of motion pictures and the only way to cut a scene was to start recording at the exact moment the scene started and stop recording the exact moment that the scene ends as it was impossible to cut out any footage that went over the recording time. This means the whoever operated the camera had to be as accurate as possible as mistakes couldn't be taken out, the camera could only record what was in front of the lens, especially due to the fact that the camera also couldn't be moved, due to this most early motion pictures would be one long continuous shot. Eventually early editing and 'cuts' became more common and in order to do this the editor would use a microscope and a razor blade to be as accurate and precise as possible as they were physically cutting the film themselves. This meant that mistakes couldn't be made as some film may be lost. After the film was cut with a razor blade it was then glued to the next part of the motion picture to create more detailed storytelling as film makers felt that it added to a viewers sense of tale rather than one long continuous shot.
However as digital editing evolved and became more advanced so did the way the scenes were cut, Now cutting doesn't have to mean that the camera starts and stop filiming with the scene it can film for a little longer and can get digitally cut on the computer in order to make sure that everything needed in the scene is used and not cut my mistake.
Moviola
The Moviola was a machine that was invented in 1924 and became the standard for motion picture editing up until the 1970s. The reason as to why it was so popular is because it allowed editors to study each single frame that was captured in extreme detail and depth meaning that they were able to see exactly what frame needed to be cut during the editing process without losing any important parts of filming. This style of editing meant that cuts could become more accurate as editors could better decide where the best cut point would be and allowed to start maximising the use of editing to the best of its ability.
Flatbed edit suite
This machine allowed for film and sounds rolls to be edited either simultaneously or at separate times by the images and sound rolls being loaded onto separate plates, the image of the film is shown on the screens while the sounds plays alongside the images either simultaneously or not. Whole the images and sound rolls run the editor can chance how they play to fit the editor’s needs. Along with this if a part of the scene needs to be cut then a mark can be made so the editors know where this needs to be done and at which exact moment. The most common flatbed edit suite were either the six plate or the eight plate most likely made by Steenbeck and K-E-M in the 1930s.

Linear and Non linear editing
Linear editing is when all editing of footage has to be done in the order that it was filmed or in chronological order of the story and cannot jump between editing different clips from different times, this was what used to be standard practice before digital editing became more advanced and non-linear editing became more popular. As editing techniques developed more the non-linear way of editing became more popular as this allows editors to move from clips to edit and don’t have to stick to the order which was filmed. This way of editing allows for the editor to have longer to make decisions on editing certain clips and can come back to re edit a previous scene that didn’t work well. This also means that if mistakes are made the editing process doesn't have to start again like it would with linear editing as editors can go back and cut between editing different clips or different scenes.
Offline and online editing
Offline editing is when raw footage from filming gets copied / duplicated and then only the copied version if the footage is then edited. Offline editing is very similar to non-linear editing as the process can move back and forth and doesn’t have to happen in the order in which footage was captured etc.
'Offline editing in simple terms is the use of proxy footage, duplicate footage of the original source, for video editing.' – Chris Gates
'Offline editing in simple terms is the use of proxy footage, duplicate footage of the original source, for video editing.' – Chris Gates
Online editing occurs after offline editing where the final touches are added, its where the final stages of the editing process can be done by using a computer software. However online editing isn’t suitable for live footage.
CMX 600
This was the first non linear editing system which used used two screens with a light pen where the right screen would show the preview of the footage, the pen would then be used to edit the footage and make cuts, finally the left screen would show the edited footage. This way of editing was first introduced in 1971.

Edit Droid and Avid 1
These were the frst ways of electronically editing film and did so by projecting the use of graphical display within film and television, eventually many films started using Edit Droid instead of things like the moviola and later switched to Avid 1 creating films like 'Lets Kill All The Lawyers(1992)
Modern editing platforms.
In the postmodern era we have moved of from the times of litteraly cutting film in order to edit and have moved onto digital software such as Premire Pro which can be more widley accessible to the public rather than just editors, these types of systems allows for importing and exporting footage, adding special effects to footage and digitally enhancing them. Modern editing platforms allows for more high and extremley low budget films to made made and easily editing from things like YouTube for channels such as Justin Odisho to big productions such as Gone Girl 2014 and Deadpool 2016.


1)https://www.netribution.co.uk/blogs/guides/2090-from-razor-blade-to-desktop-a-history-of-video-editing
2)https://www.infoplease.com/features/movies-tv-and-music/movies-and-film-fade-brief-history-editing
3)https://emilywheelhousehnccreativemedia.wordpress.com/2016/08/31/development-of-editing-technology/
4) Johnathon Paul, (June 25 2015), avaliable from The Beat.com, What is offline video editing? How does it work….and is it a thing of the past?, What is offline editing?, www.premiumbeat.com, acessesed 19th September 2018
5) https://motionarray.com/blog/how-hollywood-is-turning-to-premiere-pro
Monday, September 17, 2018
ISO, Aperture, Shutter Speed, Pull Focus, Exposure tringle
The exposure Triangle.
The exposure triangle is made up of ISO, shutter speed and aperture which controls noise/grain, motion blur and depth of field. Instead of only adjusting one of these 3 elements adjusting all of them will help to gain a high quality image that will be more effective to the audience of the shot. Learning to understand the exposure triangle will allow for the capture of an extremely effective image.
Evidence and demonstration of understanding of ISO
The ISO of the camera effects moving image as it affects the sensitivity that the camera has to the light. When using the camera outdoors I used a lower ISO of 200 so that the camera was not as sensitive to the changing ambient lighting and helped to produce a cleaner image. I have shown this in my clip by using a ISO of 200 and a low aperture of 3.5. I feel that the moving image I caught was effective as the image is clear and the light isn't over exposed. One technical difficulty that I experienced was the image being under exposed at ISO 100 so I adjusted the this to be 200 so the cameras sensitivity to light was a bit higher and the image wasn't under exposed. When the ISO is higher the more sensitive the camera is to the light therefore when indoors with low lighting I used a ISO of 1600 so that the camera would be extremely sensitive to the light. However this ISO may mean that the quality of the image can be reduced due to the high ISO stretching the image and creating noise within the image. But it can be 2 'a good tool to help you capture images in dark environments'. When shooting outside at night I decided to compare ISO 200 and ISO 1600 to show the difference the two make which is very clear when looking at the two shots at the church is clearly seen in ISO 1600 where as ISO 200 is more dimmed and harder to make out the church. If i was to redo this I would compare different ISO's outside as well as inside with low light level and try a variety of background with different light sources at night.
Evidence and demonstrating of understanding of Pull focus.
A pull focus is often used when changing the focus while the shot is being recorded often going from one object or subject to another by adjusting between the two. It is often used in TV and Film to emphasis an element of drama taking place such as in James Bond Casino Royale when the pull focus adjusts from James Bonds face to a smashed glass of wine in the foreground. The focus shifts backwards and forwards. In order to get the pull focus to correctly work the camera needs to have a shallow depth of field, which is controlled by the apperture, so that the camera focuses on one subject only rather than everything that makes up the mise-en-secne. When creating my own pull focus I started with the camera focusing in the foreground on an elephant statue and then being moved to focus in the background on a statue of a girl. I feel that my moving image was effective as you can clearly see the pull focus taking place from shifting from the object in the foreground to the object in the background. One technical difficulty I endured was the ISO of the image being too high making the image look more noisy so I adjusted this to make the image look cleaner. If i was too improve my demonstration of a pull focus I would try it at different angles and lighting to see how it works in different levels of light.
Evidence and demonstration of understanding of Aperture
Aperture is extremely important to moving image as it allows to add dimension to the image and can also effect the exposure of the image by making it either brighter or darker. Aperture is similar to the human eye by reacting to light levels in the environment and either shrinks or expands to allow for the right amount of light to enter the camera. The larger the aperture the more light entering the camera and the smaller the aperture the less light entering, so the lighter the envisioned the lower aperture is needed and the darker the environment the higher aperture is needed. The aperture also allows for control of the depth of field withing a moving image. When first experimenting with aperture I used a 135 mm lens with an aperture of F2.8 which allowed for a extremely deep depth of field by completely blurring the background, when re doing this I used a 50mm lens looking at a leaf with an aperture of F2.8 which allowed to focus on the ear and again blur out the background. When changing the aperture too F8 when experimenting you can clearly see that the background is more clearer than the first as you can see the camera lens and make out a table and chair behind which was hard to do so in the original at F2.8. When taking another shot of the leafs i decided to use a normal lens with an aperture of F16 so that all of the depth in the image is captured and the background can clearly be seen. If I was to do this again I would try a wider range of lenses and compare all F2.8, F8 and F16 to truly show the depth of field that the aperture can create.
Aperture F2.8 with 135 mm lens.
Aperture F16 with 135 mm lens.
Aperture F 16 Normal lens.
Aperture 2.8 50 mm lens.
Evidence and demonstration of understanding of Shutter Speed
The shutter speed effects images as it can either add dramatic affect to the image or control the amount of light that enters the camera. The shutter speed is the exact amount of time the shutter is open for which can allow for more or less light to enter the camera, normally the shutter speed is left on 1/50 if no dramatic effect is needed. The shutter speed also controls the amount of motion blur that can be seen in an image the lower the shutter speed the more motion can be seen and the higher the shutter speed the less motion blur can be seen and a more clearer image is produced. However motion blur isn't always bad within moving image as it can represent speed for example when 'taking a shot of a racing car and want to give it a feeling of speed' When experimenting with shutter speed I originally used a panning shot to demonstrate how much motion blur is seen however this didn't completely work properly so I chose to redo the shots involving without the panning shot to fully demonstrate how motion blur occurs and can focus on what exactly is moving instead of moving the camera along with it. I also chose to use water going down a drain instead of moving cars to in order to show how shutter speed affects how the motion of the water is seen.
Shutter speed 1/30
Shutter speed 1\50
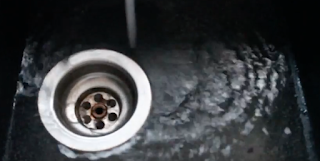
Shutter speed 1\250

The exposure triangle is made up of ISO, shutter speed and aperture which controls noise/grain, motion blur and depth of field. Instead of only adjusting one of these 3 elements adjusting all of them will help to gain a high quality image that will be more effective to the audience of the shot. Learning to understand the exposure triangle will allow for the capture of an extremely effective image.
Evidence and demonstration of understanding of ISO
The ISO of the camera effects moving image as it affects the sensitivity that the camera has to the light. When using the camera outdoors I used a lower ISO of 200 so that the camera was not as sensitive to the changing ambient lighting and helped to produce a cleaner image. I have shown this in my clip by using a ISO of 200 and a low aperture of 3.5. I feel that the moving image I caught was effective as the image is clear and the light isn't over exposed. One technical difficulty that I experienced was the image being under exposed at ISO 100 so I adjusted the this to be 200 so the cameras sensitivity to light was a bit higher and the image wasn't under exposed. When the ISO is higher the more sensitive the camera is to the light therefore when indoors with low lighting I used a ISO of 1600 so that the camera would be extremely sensitive to the light. However this ISO may mean that the quality of the image can be reduced due to the high ISO stretching the image and creating noise within the image. But it can be 2 'a good tool to help you capture images in dark environments'. When shooting outside at night I decided to compare ISO 200 and ISO 1600 to show the difference the two make which is very clear when looking at the two shots at the church is clearly seen in ISO 1600 where as ISO 200 is more dimmed and harder to make out the church. If i was to redo this I would compare different ISO's outside as well as inside with low light level and try a variety of background with different light sources at night.
Evidence and demonstrating of understanding of Pull focus.
A pull focus is often used when changing the focus while the shot is being recorded often going from one object or subject to another by adjusting between the two. It is often used in TV and Film to emphasis an element of drama taking place such as in James Bond Casino Royale when the pull focus adjusts from James Bonds face to a smashed glass of wine in the foreground. The focus shifts backwards and forwards. In order to get the pull focus to correctly work the camera needs to have a shallow depth of field, which is controlled by the apperture, so that the camera focuses on one subject only rather than everything that makes up the mise-en-secne. When creating my own pull focus I started with the camera focusing in the foreground on an elephant statue and then being moved to focus in the background on a statue of a girl. I feel that my moving image was effective as you can clearly see the pull focus taking place from shifting from the object in the foreground to the object in the background. One technical difficulty I endured was the ISO of the image being too high making the image look more noisy so I adjusted this to make the image look cleaner. If i was too improve my demonstration of a pull focus I would try it at different angles and lighting to see how it works in different levels of light.
Evidence and demonstration of understanding of Aperture
Aperture is extremely important to moving image as it allows to add dimension to the image and can also effect the exposure of the image by making it either brighter or darker. Aperture is similar to the human eye by reacting to light levels in the environment and either shrinks or expands to allow for the right amount of light to enter the camera. The larger the aperture the more light entering the camera and the smaller the aperture the less light entering, so the lighter the envisioned the lower aperture is needed and the darker the environment the higher aperture is needed. The aperture also allows for control of the depth of field withing a moving image. When first experimenting with aperture I used a 135 mm lens with an aperture of F2.8 which allowed for a extremely deep depth of field by completely blurring the background, when re doing this I used a 50mm lens looking at a leaf with an aperture of F2.8 which allowed to focus on the ear and again blur out the background. When changing the aperture too F8 when experimenting you can clearly see that the background is more clearer than the first as you can see the camera lens and make out a table and chair behind which was hard to do so in the original at F2.8. When taking another shot of the leafs i decided to use a normal lens with an aperture of F16 so that all of the depth in the image is captured and the background can clearly be seen. If I was to do this again I would try a wider range of lenses and compare all F2.8, F8 and F16 to truly show the depth of field that the aperture can create.
Aperture F2.8 with 135 mm lens.
Aperture F16 with 135 mm lens.
Aperture F 16 Normal lens.
Aperture 2.8 50 mm lens.
Evidence and demonstration of understanding of Shutter Speed
The shutter speed effects images as it can either add dramatic affect to the image or control the amount of light that enters the camera. The shutter speed is the exact amount of time the shutter is open for which can allow for more or less light to enter the camera, normally the shutter speed is left on 1/50 if no dramatic effect is needed. The shutter speed also controls the amount of motion blur that can be seen in an image the lower the shutter speed the more motion can be seen and the higher the shutter speed the less motion blur can be seen and a more clearer image is produced. However motion blur isn't always bad within moving image as it can represent speed for example when 'taking a shot of a racing car and want to give it a feeling of speed' When experimenting with shutter speed I originally used a panning shot to demonstrate how much motion blur is seen however this didn't completely work properly so I chose to redo the shots involving without the panning shot to fully demonstrate how motion blur occurs and can focus on what exactly is moving instead of moving the camera along with it. I also chose to use water going down a drain instead of moving cars to in order to show how shutter speed affects how the motion of the water is seen.
Shutter speed 1/30
Shutter speed 1\50

Shutter speed 1\250

- 1) Digital Photography school (2018) (online) avaliable from https://digital-photography-school.com (Accessed 1st October 2018) https://digital-photography-school.com/shutter-speed/
- 2) Photography Life (Febuary 2010) (online) avaliable from https://photographylife.com (Accessed 1st Obctober 2018) https://photographylife.com/what-is-iso-in-photography
- 3) Fstoppers (7th June 2015) (online) avaliable from https://fstoppers.com (accesssed 13th November 2018) https://fstoppers.com/education/exposure-triangle-understanding-how-aperture-shutter-speed-and-iso-work-together-72878
- 4) fotosiamo, SLR Lounge, 19th October 2012, How ISO affects your image, (online) available from https://www.slrlounge.com, (Accessed 14th September 2018)
- 5) Media college.com, The Focus Pull, (online) available from https://www.mediacollege.com, (Accessed 14th September 2018)
Wednesday, September 12, 2018
Easy Rider 1969
The film Easy Rider has been made to show the story of two 'hippies' as they travel across America in order to find a spiritual truth along with two others who want to live a more alternative lifestyle. At the very beginning of the scene a mid to long shot is used where the audience can clearly see in the mise-en-scene that the characters are taking some form of pill which induces the acid trip that they experience. This shot clearly helps the audience gain a preferred reading of living an alternative lifestyle as in the 60s drugs were not as well heard of as the decades that came after, this also helps gain the preferred reading of finding a spiritual truth as while being on these drugs they may feel an out of body spiritual experience that two characters are searching to find and allows the audience to feel like the are accompanying the journey that the characters are going on within the narrative.
Very soon after the first shot the editing of the scene uses very fast jump cuts that turns the narrative into non-linear, the fast editing and jump cuts have been used to represent the intensity of an acid trip which the characters are having which allows the audience to gain the preferred reading in relating to what's happening as it tried to make the audience experience what the characters are so they can gain the gratification of person identity. The fast editing of the jump cuts along with the non linear narrative combines in order to represent the acid trip in a more realistic way and convey a sense of verisimilitude. The sudden change in a non-linear narrative allows the audience to understand and gain the preferred reading of the text as they understand how time may move differently while having an acid trip, the fact that non-linear narrative was fairly new in the time it allows to portray the time in an acid trip in a new way to audiences. The jump cuts and non linear narrative are also a big part of the french new wave by reminding the audience that they are still just watching a movie so it helps to create meaning within the scene and remind the audience that whats happening on screen is only on screen not in real life.
As well as this many close ups are used in the quickly edited jump cuts of religious statues, the most important being Jesus on the cross as well as a mid shot of a man where in the mise-en-scene a graveyard is shown in the background, these two particular shots are used to help the audience gain a preferred reading of going through a spiritual experience. These shots showing particular things in the mies-en-scene relating to religion and spirits allows the audience to gain the gratification of personal identity as they feel that they are finding the spiritual truth or experience along side with the characters. Spirituality is also extremely emphasised when the close up of Jesus on the cross pans out into a long shot so that the audiences attention is anchored into what is happening in the narrative and emphasises the spirituality.
The clip also uses a combination of ambient lighting as well as only digits sound to make it seem more natural and again allow the audience to gain the preferred reading as they gain a sense of verisimilitude. Ambient lighting was preferred in the french new wave as it gave the film a more natural and casual look which can be seen in the slip from easy rider. In the very first shot the only sound that can be heard is diegetic dialogue which is used for an active audience to understand greater what is about to happen in the narrative. The ambient lighting is also used along side the digits sound to make the clips more realistic, the ambient lighting is also portrayed by pointing the camera directly into the sun so the audience can see the light source and feel that the acid trip can occur in everyday lift and gain the gratification of personal identity as the audience can feel like they have experienced this scenes in everyday life and can combine to relate to the acid trip happening in the narrative.
At the very start of the acid trip a panning shot is used to portray a run down building with branches coming out of the window, this shot along with the ambient lighting allows the audiences to see a gritty real life setting that those with a more alternative lifestyle may choose visit. This may have been done as a part of the french new wave was to look more natural therefore a natural setting will allow the audience to gain this feel and get the preferred reading.
Subscribe to:
Comments (Atom)

